Minor leaks in your tractor can lead to significant problems if left unattended. Whether you notice a small drip of hydraulic fluid, coolant, or engine oil, addressing the issue promptly will save you time and money down the road. This guide outlines practical steps to identify, repair, and prevent minor tractor leaks using readily available tools and materials.
Identifying the Source of the Leak
Before rushing into repairs, pinpointing the exact location of the leak is crucial. A clear diagnosis helps you choose the right replacement parts and avoid unnecessary disassembly.
- Visual Inspection: Clean the suspected area thoroughly. Use a degreaser to remove old grime, then run the engine to spot fresh fluid.
- Use of UV Dye: Add a UV-reactive dye to the suspected system (oil, coolant, or hydraulic fluid). Shine a UV lamp along hoses, gaskets, and fittings to reveal leaks.
- Pressure Testing: For coolant systems, attach a pressure tester to the radiator cap. Pressurize the system up to the recommended level and watch for drops in gauge pressure or visible spray.
- Touch and Smell: Carefully feel around hoses and fittings (once cooled) for wetness. Distinguish fluids by color and odor—coolant is often green or orange with a sweet smell, while hydraulic fluid is darker and oilier.
Gathering Essential Tools and Materials
Having the right tools on hand makes the repair process smoother and more efficient. Below is a checklist of commonly needed items for minor leak repairs:
- Wrench Set (including torque wrench): For tightening or loosening fittings.
- Screwdrivers (flathead and Phillips): Useful for hose clamps and small fasteners.
- Replacement Hoses and connectors: Match the diameter and material of the original.
- O-rings and gaskets: Purchase OEM or high-quality aftermarket parts.
- Sealant or thread locker: For sealing threaded fittings.
- Hose Clamps: Worm-gear or spring clamps sized appropriately.
- Cleanup Supplies: Degreaser, rags, and safety gloves.
- UV Leak Detection Kit: Dye, lamp, and goggles.
- Pressure Tester: For cooling systems and hydraulic tests.
Step-by-Step Repair Procedures
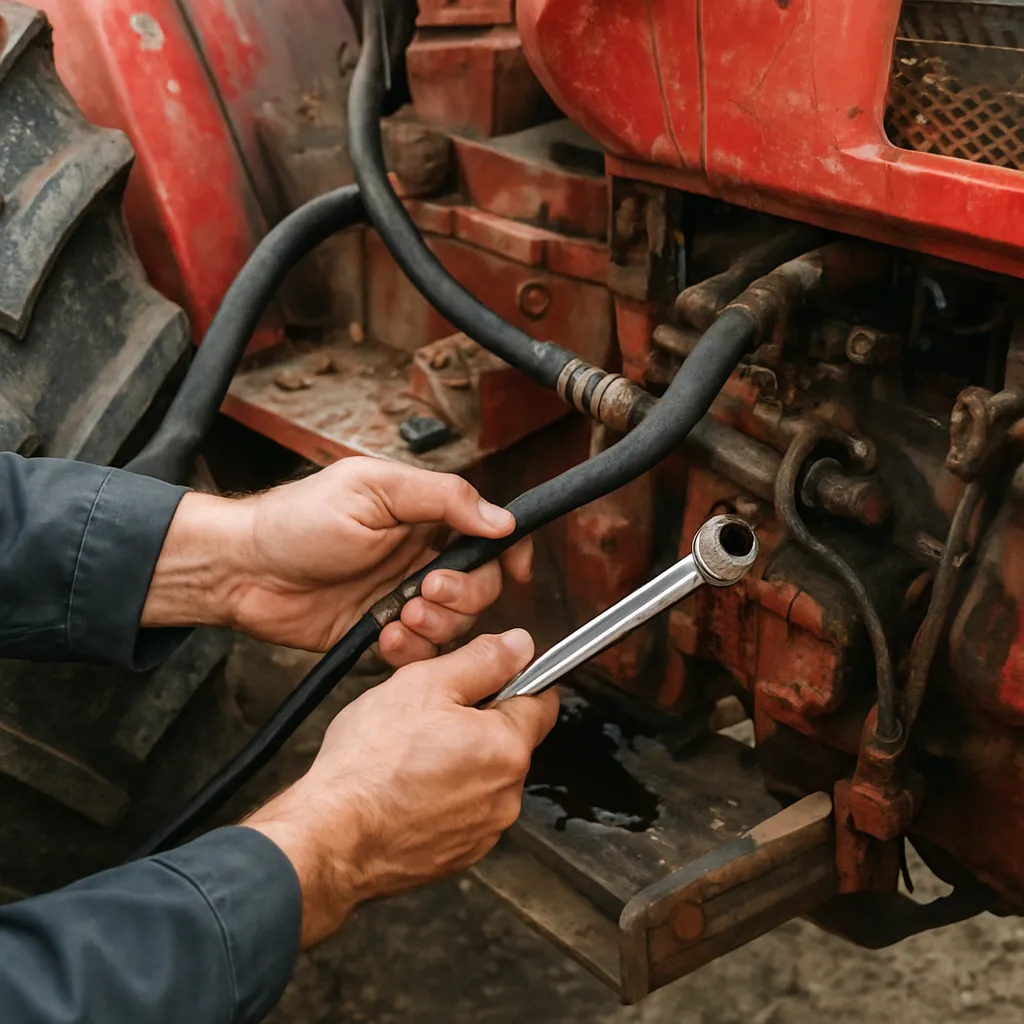
Fixing a Leaking Hose
Hoses degrade over time due to heat, pressure cycles, and chemical exposure. Follow these steps to replace a faulty hose:
- Depressurize the system. For hydraulic lines, shut off the tractor and relieve pressure by cycling the control levers.
- Loosen existing clamps with a wrench or screwdriver. Slide clamps away from the leak zone.
- Remove the damaged hose, inspecting fittings for corrosion or burrs. Clean threads and mating surfaces.
- Cut the replacement hose to length, ensuring a snug fit without kinks.
- Install new clamps at least 10 mm from each end. Position the hose, then tighten clamps evenly to the torque value specified in the service manual.
- Run the engine briefly, checking for drips. Re-tighten clamps if necessary.
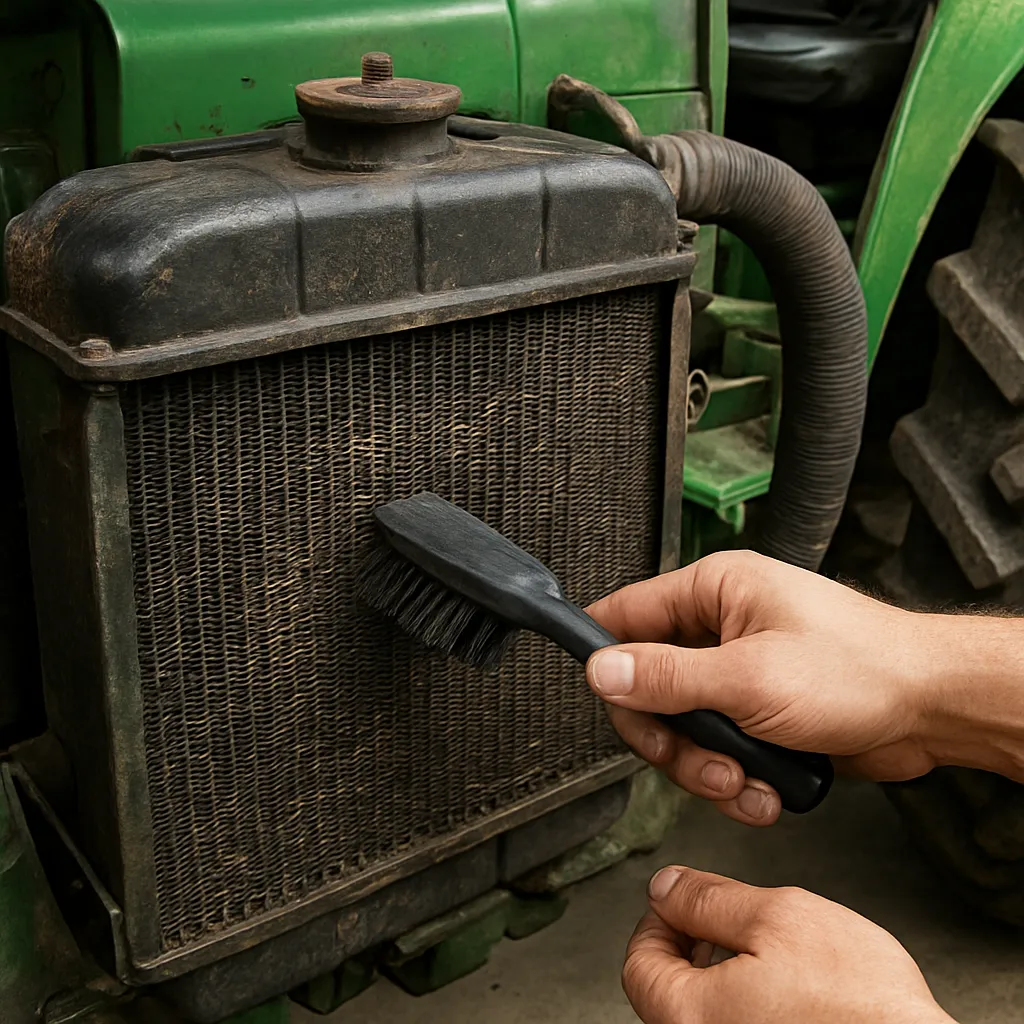
Sealing Small Cracks in the Radiator
Minor cracks or pinhole leaks in the radiator can often be sealed without removing the entire unit:
- Drain the coolant into a clean container. This prevents dilution of the sealant and avoids contamination.
- Clean the crack area with a wire brush and degreaser. Dry thoroughly.
- Apply a radiator stop-leak compound directly over the crack. Rotate the radiator gently to coat the inside surfaces.
- Let the compound cure for the recommended time (usually 15–30 minutes).
- Refill with fresh coolant mixed to the proper ratio. Bleed the system of air pockets by opening bleed valves or running the engine with the radiator cap off.
- Monitor the repair for the next few hours of operation. If the leak persists, consider a solder patch or professional radiator service.
Addressing Oil Pan Drips
Low-level engine leaks often stem from a worn pan gasket or loose bolts:
- Position a drain pan under the oil pan. Remove the pan bolts in a crisscross pattern to avoid warping.
- Gently pry the oil pan away from the engine block. Avoid gouging the mating surface.
- Remove the old gasket and clean both surfaces with gasket remover. Inspect the pan for warping or damage.
- Place the new gasket on the pan, applying a thin bead of gasket sealant if recommended by the manufacturer.
- Reinstall the pan, tightening bolts in a crisscross pattern to the specified torque.
- Refill engine oil and run the tractor. Check for leaks after the first hour of operation.
Preventive Maintenance to Avoid Future Leaks
Once repairs are complete, implementing a routine maintenance plan helps you catch potential issues early:
- Regular Inspections: Schedule monthly checks of hoses, fittings, and seals. Look for bulges, cracks, or wet spots.
- Fluid Analysis: Test hydraulic and engine oil for water contamination or excessive metal particles, which may indicate internal damage.
- Torque Checks: Vibrations can loosen fittings over time. Verify bolt and clamp torque every 100 operating hours.
- Cooling System Flush: Replace coolant every two years. This removes corrosion particles that can erode radiator tubes and seals.
- Use Quality Parts: Genuine or high-grade aftermarket components offer better longevity and leak resistance.
- Record Keeping: Maintain a log of fluid changes, inspections, and repairs. This historical data helps predict when components approach end of life.
By following these guidelines for identification, repair, and prevention, you can keep minor leaks from turning into major breakdowns. Consistent attention to your tractor’s fluid systems ensures reliable performance during every job.