Installing LED lighting on a tractor can transform night-time work, boosting safety and operational efficiency. This guide will walk you through selecting the correct LED units, preparing your machine, handling wiring connections and ensuring water-resistant setups for reliable performance. Whether you’re upgrading an older model or fitting new equipment on a modern rig, these steps will help you achieve professional-grade results.
Essential Preparation and Safety Measures
Before diving into the mechanical steps, ensure you have a clean, well-lit workspace and all necessary parts. Working in a clutter-free area will reduce mistakes. A sturdy workbench, portable jack stands and wheel chocks are critical for securing your tractor during installation.
Gathering Your Toolkit
- Screwdrivers (flat and Phillips)
- Wire strippers and crimping tool
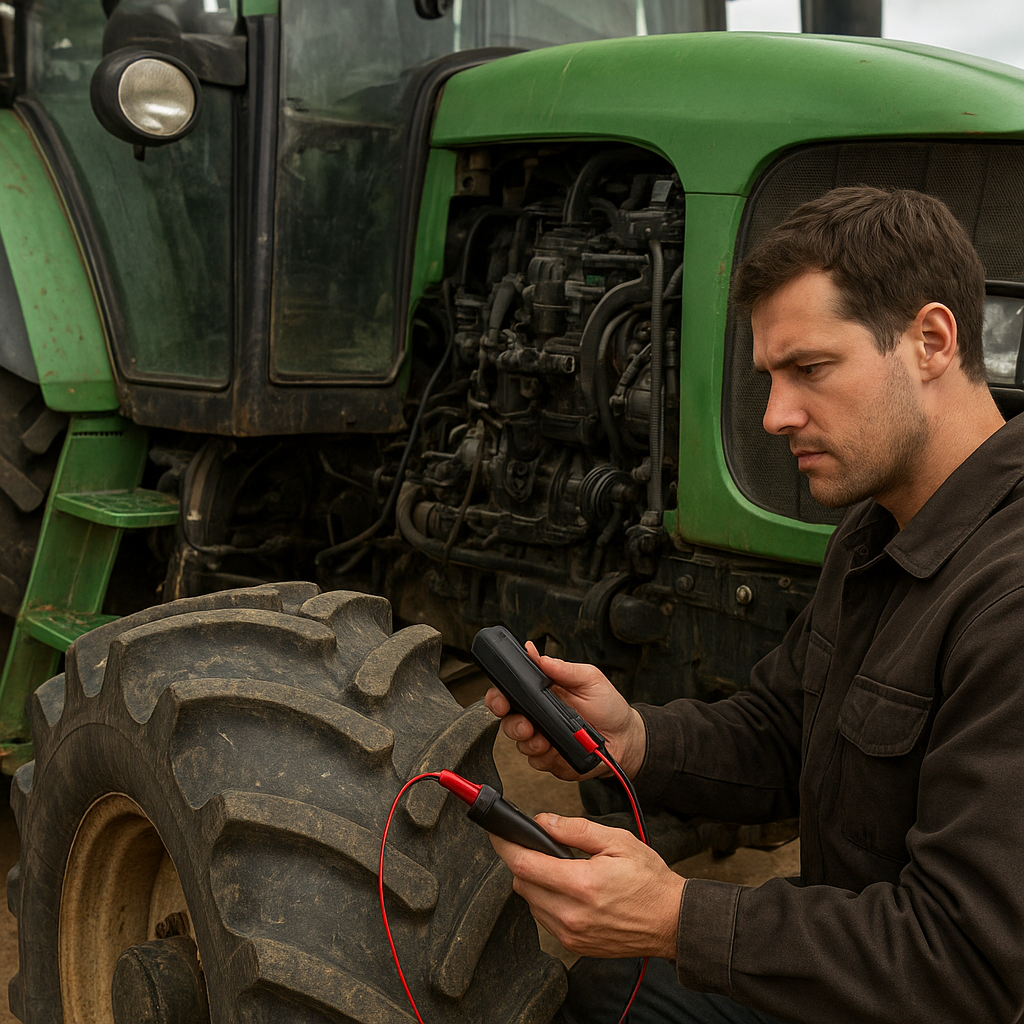
- Multimeter for testing voltage
- Heat gun or lighter for shrink tubing
- Self-tapping screws and mounting brackets
- Protective gloves and safety glasses
Safety Considerations
- Disconnect the battery to avoid shorts and accidental shocks.
- Wear protective eyewear when drilling or cutting metal.
- Use gloves to prevent cuts and bruises.
- Always follow the tractor manufacturer’s guidelines for electrical modifications.
Choosing the Right LED Fixtures
Select lighting that matches your needs in terms of brightness, mounting style and environmental resistance. LEDs come in various beam patterns, from spot to flood, and their housings vary in shape and size.
Understanding Lumen Ratings
Lumens indicate the perceived illumination output. For heavy-duty tractor tasks at night, aim for at least 2,000–3,000 lumens per light bar. A combination of spot and flood beams helps you see both distant obstacles and the ground immediately in front of your wheels.
Environmental Protection
Tractors operate in dusty, muddy and wet conditions. Choose LED housings rated IP67 or higher for optimal waterproof and dust protection. Look for units with marine-grade aluminum, stainless steel hardware and polycarbonate lenses for superior durability.
Step-by-Step Installation Process
This section guides you through mounting your lights, running wires and final testing.
Mounting the LED Fixtures
- Identify mounting points on the tractor’s frame or roll cage. Ensure these areas are strong enough to hold the light’s weight.
- File or sand paint away at drilling spots to expose bare metal and prevent rust.
- Drill pilot holes and attach mounting brackets using lock washers and self-tapping screws.
- Position the light bar or pod, align the beam angle and tighten all hardware securely.
Wiring and Electrical Connections
- Route wires along existing harnesses or inside protective conduit to avoid abrasion.
- Use a relay and fuse rated for the total current draw of your LEDs to protect the tractor’s electrical system.
- Splice into the battery’s positive and negative terminals using heavy-gauge wire (at least 14 AWG for most light bars).
- Install an inline fuse holder as close to the battery positive terminal as possible.
- Run the trigger wire from the light harness to a dash-mounted switch or the tractor’s auxiliary power circuit.
Final Testing and Adjustment
- Reconnect the battery and turn on the switch.
- Use a multimeter to confirm correct voltage at the LED terminals.
- Fine-tune beam angles by loosening the brackets slightly and aiming the lights for maximum field coverage.
- Tighten all hardware once the ideal position is found.
Maintenance and Troubleshooting Tips
Regular inspections and routine care will extend the life of your LED system. Establish a maintenance schedule that aligns with your tractor’s service intervals.
Routine Checks
- Inspect all electrical connections every 50 hours of operation for corrosion or looseness.
- Clean lenses and heat sinks with mild detergent to maintain performance.
- Verify that waterproof seals and shrink tubing have not degraded over time.
Common Issues and Fixes
- Dim or flickering lights: Check ground connections and ensure the relay is functioning properly.
- Lights not turning on: Test the switch wiring, fused circuit and battery charge.
- Overheating housings: Confirm that the LED current draw matches the driver’s rating and that air circulation around the unit is unobstructed.
Upgrades and Expansion
- Consider adding a secondary light bar to the rear of your tractor for improved visibility during reverse operations.
- Wireless remote or smartphone-controlled LED drivers offer customizable brightness levels and grouping of light zones.
- High-output work lights with integrated flashers can enhance your tractor’s visibility to other vehicles on public roads.