Tractor engines are the heart of modern agricultural machinery, and understanding their warning lights is essential for both novices and experienced operators. Recognizing the meaning behind each symbol can prevent costly breakdowns and ensure safe, efficient operation in the field.
Understanding the Importance of Warning Indicators
Every tractor dashboard features a set of sensors and warning lights designed to monitor critical systems in real time. These indicators act like the tractor’s nervous system—sending immediate alerts when something deviates from normal parameters. Ignoring a warning light may compromise safety, reduce overall performance, or lead to irreversible engine damage. Taking the time to decode these signals helps maintain reliability and extends the service life of expensive components.
Decoding Common Warning Lights
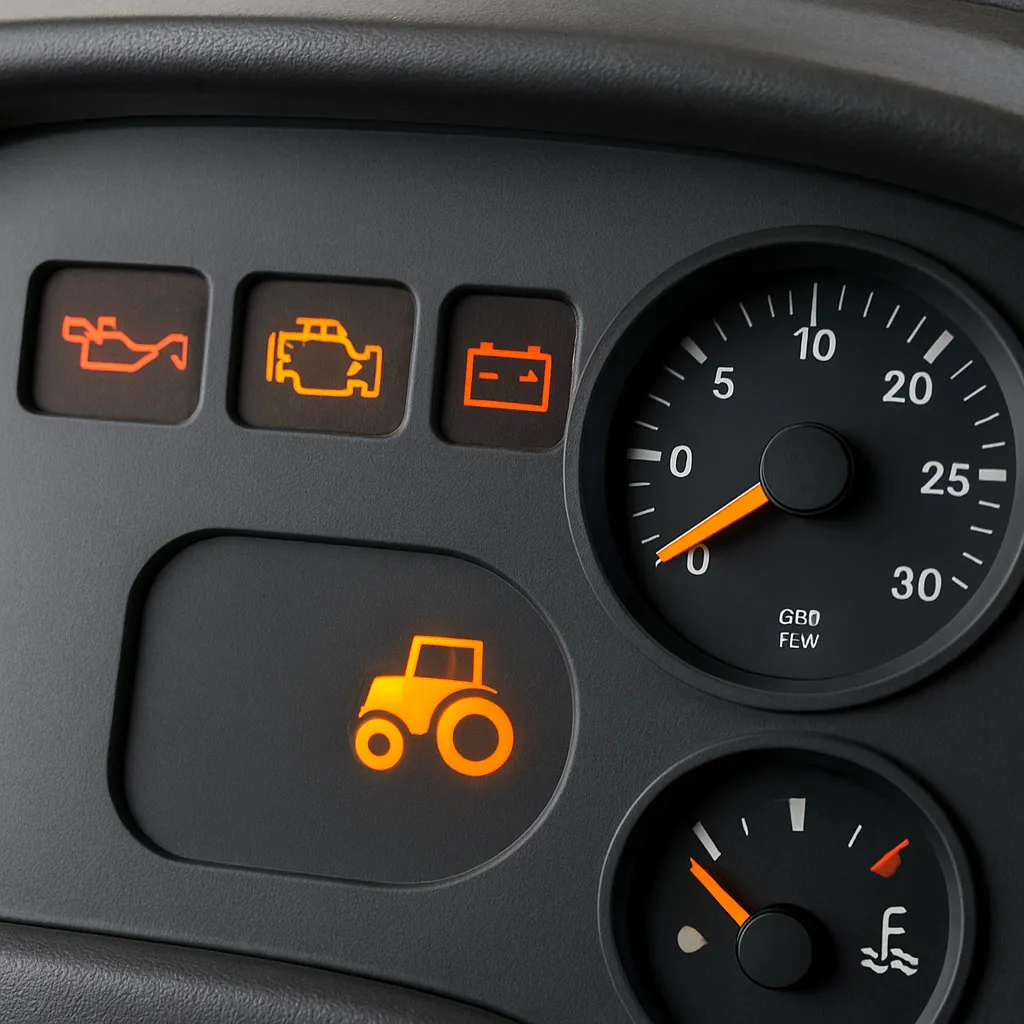
While tractor models vary, most manufacturers use similar icons to represent key functions. Below is a breakdown of the most frequently encountered warning lights and their meanings.
- Engine Temperature (Thermometer icon): Indicates coolant overheating.
- Oil Pressure (Oil can icon): Signals low lubrication or pump failure.
- Battery Charging (Battery icon): Alerts to charging system or alternator issues.
- Hydraulic System (Gear or fluid-drop icon): Shows pressure loss in hydraulics.
- Glow Plug Preheat (Coiled wire icon): In diesel tractors, signals cylinder preheating.
- Fuel Filter/Water Separator (Droplet over filter icon): Warns of water accumulation in fuel.
- PTO Engagement (Power Take-Off shaft icon): Indicates shaft engagement or slip.
Engine Temperature Warning
This light typically appears as a thermometer submerged in liquid. It warns of overheating within the coolant circuit. Operating under high loads or towing heavy implements can push the engine beyond safe temperature thresholds. To respond:
- Stop the tractor and allow the engine to cool.
- Check coolant level and inspect hoses for leaks.
- Examine radiator fins for debris blocking airflow.
- Confirm the thermostat and water pump function properly.
Oil Pressure Warning
An oil can icon with a dripping drop signals insufficient oil pressure. Low pressure can starve bearings of lubrication, leading to scoring and eventual engine seizure. Key steps:
- Shut off the engine immediately to prevent damage.
- Check oil level and top up with the manufacturer-approved grade.
- Inspect the oil filter for clogs or signs of metal debris.
- Test the pressure sensor or oil pump if problems persist.
Battery Charging Alert
The battery icon warns of issues in the charging system. A failing alternator, damaged belt, or corroded terminals can lead to a drained battery and stalled engine. To troubleshoot:
- Inspect the alternator belt for proper tension and cracks.
- Measure battery voltage with a multimeter; it should read around 13.5–14.5 V when running.
- Clean and tighten battery connections to ensure good conductivity.
- Replace a faulty alternator or voltage regulator if readings remain low.
Hydraulic System Indicator
A gear or fluid-drop icon appears when hydraulic pressure drops below safe limits. Without sufficient pressure, implements such as loaders or backhoes cannot operate. Respond to this warning by:
- Checking hydraulic fluid level in the reservoir.
- Inspecting hoses and fittings for leaks or damage.
- Replacing worn filters to maintain fluid cleanliness.
- Testing the hydraulic pump and relief valve settings.
Glow Plug Preheat Light
Diesel engines require preheating in cold conditions. The coiled-wire icon signals that cylinders are warming up. If the light stays on or flashes rapidly, it could indicate a diagnostics fault in the glow plug circuit. To address this:
- Allow adequate warm-up time before cranking the engine.
- Test individual glow plugs for resistance using an ohmmeter.
- Inspect the glow plug relay or control module for proper operation.
Routine Maintenance and Troubleshooting Steps
Proactive maintenance reduces the frequency of warning light activations and helps you diagnose issues more efficiently when they do occur. Establish a regular schedule of inspections and tests to support long-term tractor health.
- Visual Inspection: Walk around the tractor before each use. Look for loose wires, puddled fluids, or damaged hoses.
- Fluid Analysis: Periodically sample engine oil, coolant, and hydraulic fluids. Check for contaminants, water ingress, or metal particles.
- Filter Replacement: Swap air, fuel, oil, and hydraulic filters according to the service manual intervals.
- Software Updates: Modern tractors often include electronic engine controllers. Ensure firmware is up to date to maintain accurate sensor readings.
Using Diagnostic Tools
Advanced scanners can interface with the engine control unit (ECU) to read fault codes. These codes provide precise information about sensor failures or system anomalies. When using a diagnostic tool:
- Connect the scanner to the onboard diagnostics port.
- Retrieve and record any stored error codes and freeze-frame data.
- Clear codes after repairs and retest to confirm successful resolution.
- Reference the manufacturer’s code book for detailed explanations.
When to Seek Professional Help
Certain issues—such as internal engine damage or complex electrical faults—require specialized equipment and expertise. Consider professional service when:
- Multiple warning lights illuminate simultaneously.
- Engine performance is severely compromised despite basic checks.
- Error codes point to internal failures, like camshaft or crankshaft sensors.
- Hydraulic leaks are extensive or involve high-pressure lines.
In these cases, certified technicians can perform in-depth troubleshooting and engine disassembly, ensuring your tractor returns to peak performance with minimal downtime.