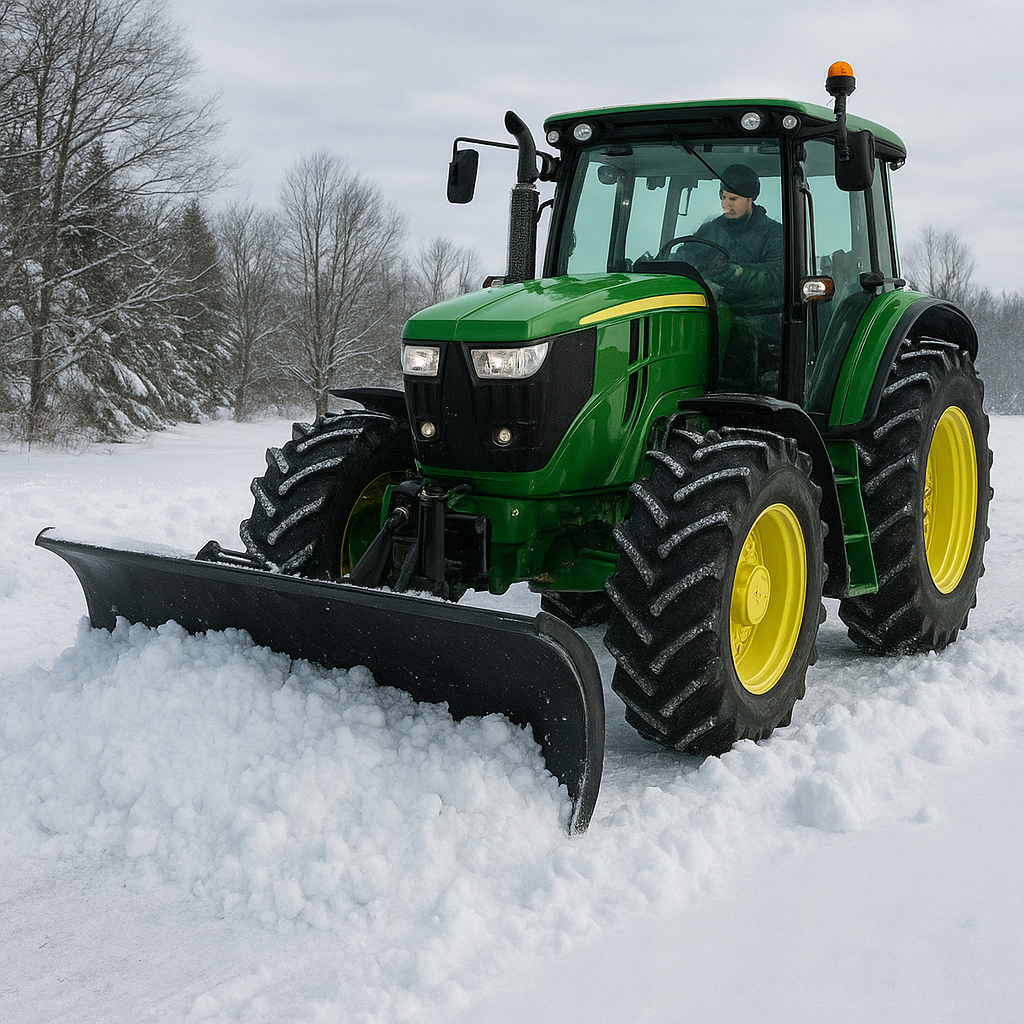
Unlock the potential of your tractor for efficient snow removal this winter. Equipped with the right attachments and following proper safety protocols, you can transform property maintenance into a swift, reliable operation. In the following sections, you’ll learn how to select the ideal equipment, prepare your machine for heavy-duty work, master effective plowing technique, and perform post-season maintenance to ensure long-term efficiency.
Selecting the Ideal Plow Blade and Tractor Configuration
Choosing the correct snow removal setup begins with assessing your needs. Tractors vary in horsepower, weight distribution, and drivetrain, all of which impact performance in deep snow. Meanwhile, plow blades come in different shapes and materials, each designed to handle specific conditions.
Match Horsepower to Plow Size
- Light-Duty Tractors (25–50 HP): Best with 6–7-foot straight blades for driveways and small lots.
- Medium-Duty Tractors (50–75 HP): Compatible with 7–8-foot adjustable or wing plows for larger yards.
- Heavy-Duty Tractors (75+ HP): Pair with 8–12-foot V-plows for commercial driveways and roadways.
Installing a blade that exceeds your tractor’s capacity can strain the engine and hydraulics, whereas an undersized plow forces you to make extra passes, reducing overall efficiency.
Material and Design Considerations
- Steel Blades: Durable, ideal for rocky or uneven surfaces, but heavier on the machine.
- Polyurethane Blades: Lighter and gentler on paved surfaces; less effective on packed ice.
- Trip-Blade vs. Fixed-Blade: Trip-blades deflect on impact with obstacles, protecting your tractor’s frame.
Selecting a blade with adjustable moldboard angles allows you to fine-tune the throw distance and plow path. Always verify that your tractor’s traction—whether two-wheel drive or four-wheel drive—can handle the weight and resistance created by the plow.
Preparation and Safety Measures Before Snow Operations
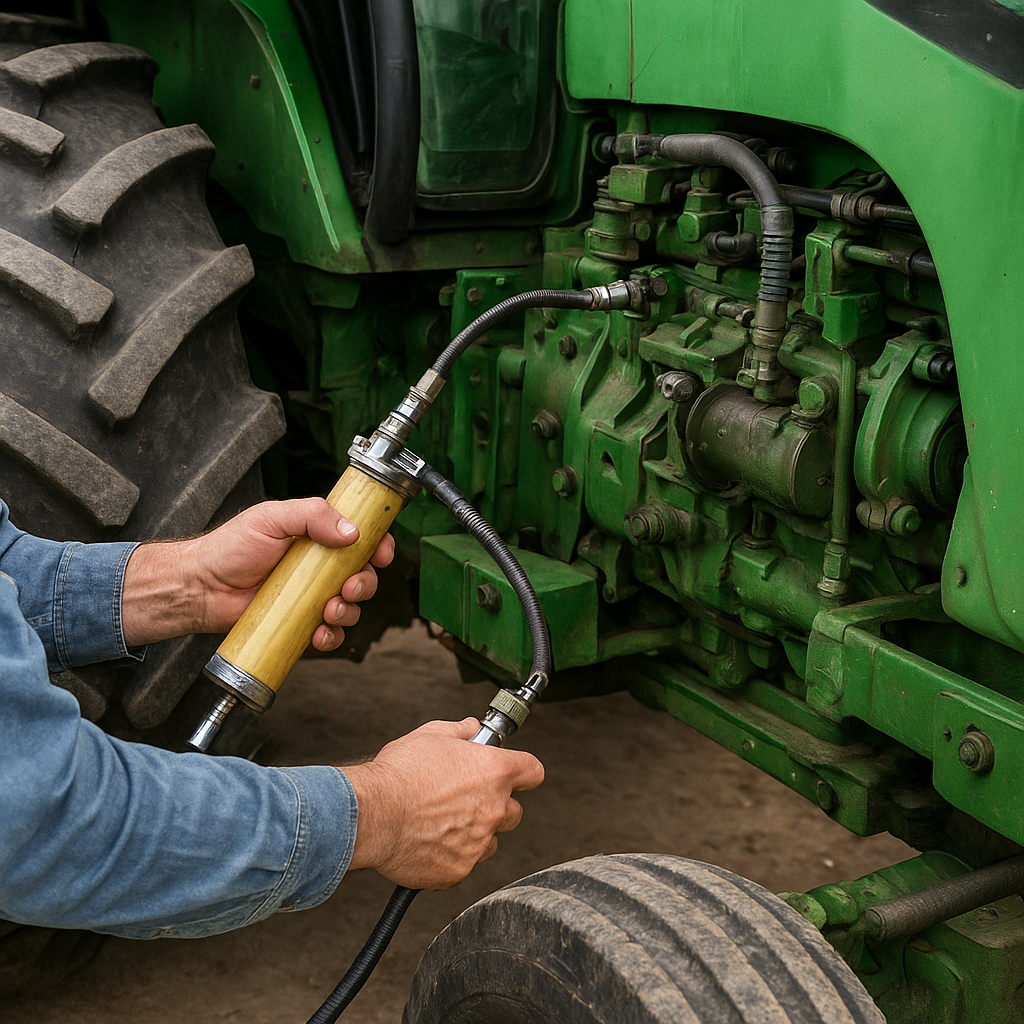
Prioritizing safety and thorough preparation protects both operator and machine. Before the first snowfall, conduct a complete inspection and install essential accessories.
Pre-Season Inspection Checklist
- Engine Oil and Filters: Replace or top off to recommended levels.
- Hydraulic Fluid: Check for contamination and correct pressure output.
- Tire Condition and Pressure: Equip snow or industrial tires; consider tire chains for extreme conditions.
- Lighting and Visibility: Install LED work lights and ensure rearview mirrors are properly adjusted.
Cold weather can thicken fluids and weaken batteries. Keep a set of jumper cables and winter-grade oil on hand. Proper visibility is critical; consider adding a heated cab or defrost system for frost-free windows.
Operator Gear and Emergency Kit
- Insulated Coveralls, Boots, and Gloves: Protect against frostbite during extended use.
- Fuel Additives: Prevent gelling in diesel engines.
- First Aid Kit and Emergency Flares: Essential in case of breakdown or low visibility.
- Communication Device: Two-way radio or fully charged mobile phone.
Educate all operators on safety protocols, including recognizing signs of hypothermia and proper plow hitch adjustments. Clear any debris or obstacles from your work area before starting.
Effective Snow Plowing Techniques
Mastering efficient plowing technique saves time and reduces wear on your tractor. Adjust your approach based on snow depth, terrain, and the type of blade in use.
Angle and Speed Management
- Optimal Blade Angle: Set between 25° and 35° for maximum lateral throw.
- Consistent Ground Speed: Maintain 3–5 mph; too fast causes inefficient cutting, too slow may bog down the tractor.
- Staging Passes: Start with a shallow first pass to break up compacted snow, then follow with deeper cuts.
On slopes, always plow uphill to prevent sliding. When using a wing plow, adjust wing height dynamically to match changing snow loads.
Clearing Corners and Tight Spaces
- Backdrag Technique: Use rear angled blades to clear behind obstacles when forward plowing is impractical.
- Scoop-and-Discharge Method: Lower the blade slightly below ground level, scoop snow, then lift and tilt to discharge.
- Two-Pass Strategy: Clear perimeter first, then work inward in parallel lines for uniform results.
For high-traffic areas, plan snowbanks away from entrances and roads. Reposition plowed snow periodically to avoid buildup that hampers drainage.
Post-Season Maintenance and Storage
After the last snowfall, proper maintenance extends the life of your plow and attachments. Follow a systematic approach to cleaning, inspection, and storage.
Cleaning and Rust Prevention
- Pressure Wash: Remove salt and grime from blades and undercarriage.
- Dry and Inspect: Check for cracks, weld failures, or bent components.
- Lubrication: Apply grease to all pivot points and hydraulics according to manufacturer specs.
- Rust-Proofing: Spray anti-corrosion agent on steel surfaces.
Neglecting thorough cleaning accelerates wear and leads to premature replacement of high-value parts.
Storage Best Practices
- Indoor Storage: Keep tractor and plow in a dry, well-ventilated shed.
- Blade Hitch Position: Lower slightly off the ground to relieve hydraulic pressure.
- Battery Maintenance: Disconnect or use a trickle charger to maintain optimal voltage.
- Cover Sensitive Areas: Shield hoses and exposed electronics from rodents and moisture.
Document all repairs and fluid changes. A detailed log helps you start the next season without surprises, ensuring your snow removal setup remains a reliable asset.