Implementing a GPS-based guidance system on modern farm machinery can transform field operations, enhancing productivity and reducing waste. By carefully selecting compatible components, installing equipment accurately, and fine-tuning settings, operators can achieve centimeter-level precision in planting, spraying, and tillage tasks. This guide outlines essential steps for setting up a GPS guidance system on your tractor, from planning and hardware installation to calibration, testing, and ongoing maintenance.
System Requirements and Planning
Before beginning physical installation, assess your farm’s needs and establish a clear plan. A successful setup requires compatibility between the display console, receiver, antennas, and correction source. Consider the following elements:
- Receiver type: choose between basic WAAS/EGNOS for sub-meter accuracy or advanced RTK corrections for 2–3 cm repeatability.
- Display console compatibility: ensure your tractor’s control system supports your guidance software (e.g., John Deere GreenStar, Trimble FMX, or Topcon X35).
- Power supply and mounting brackets: verify voltage requirements and secure attachment points for the receiver and antenna.
- Correction source: select a radio or cellular modem for RTK data, or subscribe to satellite-based augmentation services.
Accurate planning reduces the risk of downtime. Document your tractor’s electrical layout, roof structure for antenna placement, and any potential interference sources such as satellite jammers or dense tree cover.
Hardware Installation
Proper hardware setup ensures optimal signal reception and system reliability. Follow these guidelines for mounting and wiring:
Antenna Placement
- Locate the antenna on the highest point of the cab roof, free from obstructions and metal plating that could block signals.
- Use a non-magnetic mounting plate or fiberglass roof adapter to avoid interference with the GNSS chipset.
- Route the coaxial cable through grommets or existing harness channels to protect against chafing and moisture.
Receiver and Console Mounting
- Secure the receiver module inside the cab or under the roof headliner using vibration-damping brackets.
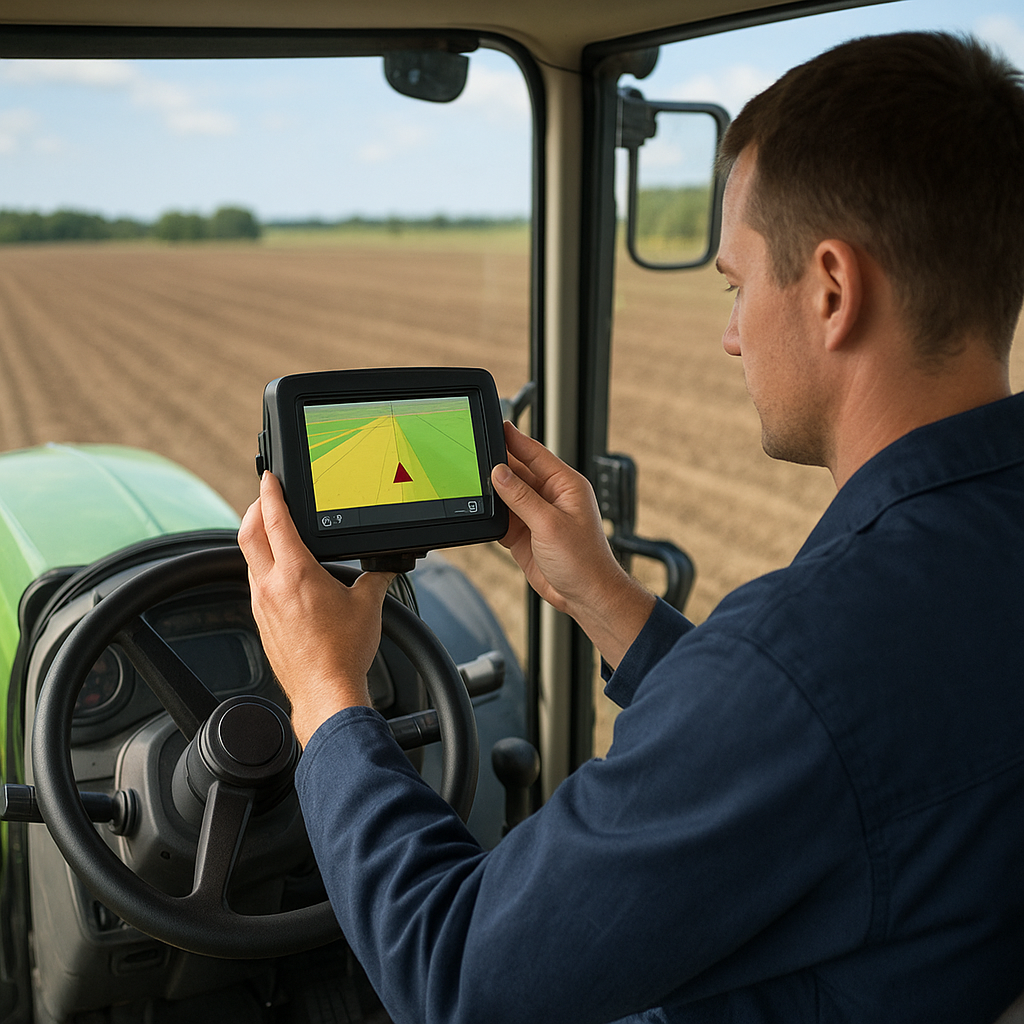
- Mount the display console within arm’s reach, ensuring clear visibility and safe operation during field work.
- Connect power and data cables: typically a 12V or 24V supply, plus CAN, serial, or Isobus connections depending on your equipment.
- Label all cables and connectors to simplify future diagnostics and upgrades.
Correction Link Setup
- For RTK operation, install a radio modem with a clear line of sight to the base station or network tower.
- Alternatively, configure a cellular modem and SIM card for NTRIP access to correction streams via the internet.
- Confirm antenna orientation and signal strength using the receiver’s diagnostics menu before sealing access panels.
Software Configuration and Calibration
Once the hardware is in place, initialize the guidance software and perform critical calibrations to align sensors and control systems.
Initializing the Guidance System
- Power on the tractor and guidance console. Navigate to the system setup menu and identify the connected GPS receiver type.
- Enter your correction parameters: radio frequency, base station coordinates, or NTRIP credentials.
- Verify that the console acquires satellites and displays the chosen correction mode (e.g., RTK Float, RTK Fixed, WAAS).
Straight Line and Auto-Steering Calibration
- Use a known straight reference, such as a road edge or a string line, to test manual steering and assess drift.
- Activate auto-steering in a low-speed mode and verify that the tractor maintains the reference line within acceptable tolerance.
- Adjust the steering gain and response curves in the software to reduce oscillations and late corrections.
Implement Offset and Section Control
- Define the tool’s GPS offset from the tractor’s antenna to the implement’s centerline for accurate pass-to-pass alignment.
- Configure section control parameters to automate boom or seeder sections based on geofencing or AB line overlaps.
Testing and Fine-Tuning
After completing basic calibration, field tests help identify subtle issues and optimize system performance under real-world conditions.
- Run a test pass along a predefined boundary. Check for consistent overlap and gaps in coverage. Note any steering lags or overshoots.
- Evaluate performance on different slopes and varied terrain. Fine-tune the pitch and yaw sensors (if equipped with an IMU) to compensate for roll and elevation changes.
- Record data logs for later analysis. Review pass-to-pass deviation metrics to quantify system accuracy and detect trends.
Continuous monitoring during the first few hours of operation helps identify suboptimal settings. Adjust the correction update rate or switch between SBAS and RTK modes based on field requirements and connectivity reliability.
Maintenance and Troubleshooting
Regular maintenance and proactive diagnostics extend the life of your guidance system and minimize unexpected downtime.
Routine Inspections
- Check antenna mounts and cables monthly for wear, corrosion, or loose fittings.
- Ensure firmware on the receiver and display console is up to date, following manufacturer recommendations.
- Clean connectors with contact cleaner and seal any exposed cable entry points with silicone or rubber grommets.
Common Issues and Solutions
- No satellite lock: verify antenna connection, clear any overhead obstructions, and confirm correct receiver model is selected in software.
- Poor signal quality: inspect coaxial cable for damage or water ingress; replace the cable if attenuation exceeds specifications.
- Auto-steering instability: revisit calibration procedures, increase steering gain damping, or install an external IMU for pitch/roll compensation.
- RTK dropouts: check radio link power levels, verify base station coordinates, or switch to a cellular NTRIP source if coverage allows.
By following these steps and maintaining a disciplined testing and maintenance routine, you can exploit the full benefits of GPS guidance on your tractor fleet. High-accuracy positioning not only improves operational efficiency but also reduces input costs and environmental impact through precise application of seeds, fertilizers, and chemicals.