Properly configuring a modern tractor before plowing is essential for efficient field work and long-term equipment health. This guide outlines key steps—from selecting the right machine and implement to fine-tuning settings and conducting routine checks. Following these recommendations will help operators achieve consistent furrow depth, optimal soil turnover, and reliable performance across varied terrain.
Selecting and Inspecting the Tractor
Assessing Tractor Capacity
Begin by matching engine power and weight to the planned plowing task. A tractor with sufficient engine torque ensures smooth traction when pulling a heavy plow through dense soil. Review the manufacturer’s specifications for horsepower rating, axle load, and hydraulic flow rate. Undersized tractors may struggle on compacted fields, while oversized models consume more fuel and cause excessive soil compaction.
Inspecting Key Components
Perform a thorough safety check before hitching any implement. Examine the tires for proper inflation and wear; uneven tread can lead to drifted furrows. Inspect the three-point hitch, drawbar, and hitch pins for cracks or deformation. Verify that all bolts and nuts are torqued according to service manuals. Look for hydraulic leaks around valves and cylinders, as low pressure can hinder plow lift and tilt functions.
Checking Hydraulic Systems
Hydraulics drive many plow adjustments on modern tractors. Confirm fluid levels are within recommended ranges and replace filters if due. Operate the hydraulic controls to raise and lower the arms, checking for smooth, steady movement. Erratic motion or slow response may indicate worn seals or contaminated fluid. Address these issues immediately to maintain accurate depth control and prevent sudden plow drop during operation.
Choosing and Preparing the Plow
Match Plow Type to Soil Conditions
Select a plow design—moldboard, chisel, or disc—based on field texture and desired tillage depth. A moldboard plow effectively inverts heavy clay soils, while a chisel plow minimizes disturbance in lighter soils. Review furrow width and implement weight to ensure compatibility with tractor lift capacity. Using an ill-suited plow leads to uneven cutting, increased draft requirements, and lower fuel efficiency.
Inspecting Plow Wear and Damage
Before mounting the implement, examine the shares, landsides, and moldboards for wear. Dull or chipped cutting edges increase draft force, causing the tractor engine to run at higher RPM. Replace worn shares or sharpen them to maintain clean slicing action. Check frame welds for cracks and ensure all bolts are secure. Lubricate moving parts like skimmers and coulters to reduce friction and prevent rust.
Adjusting Plow Settings
Adjust the plow gauge wheels and landside friction to set an initial cutting depth. Begin with a shallow setting and gradually increase until the bottom of the furrow meets the recommended depth for your crop rotation plan. Balance the right and left plow bodies so each wing cuts evenly; unbalanced settings cause the tractor to veer and tire wear to accelerate. Record these settings for quick setup in future operations.
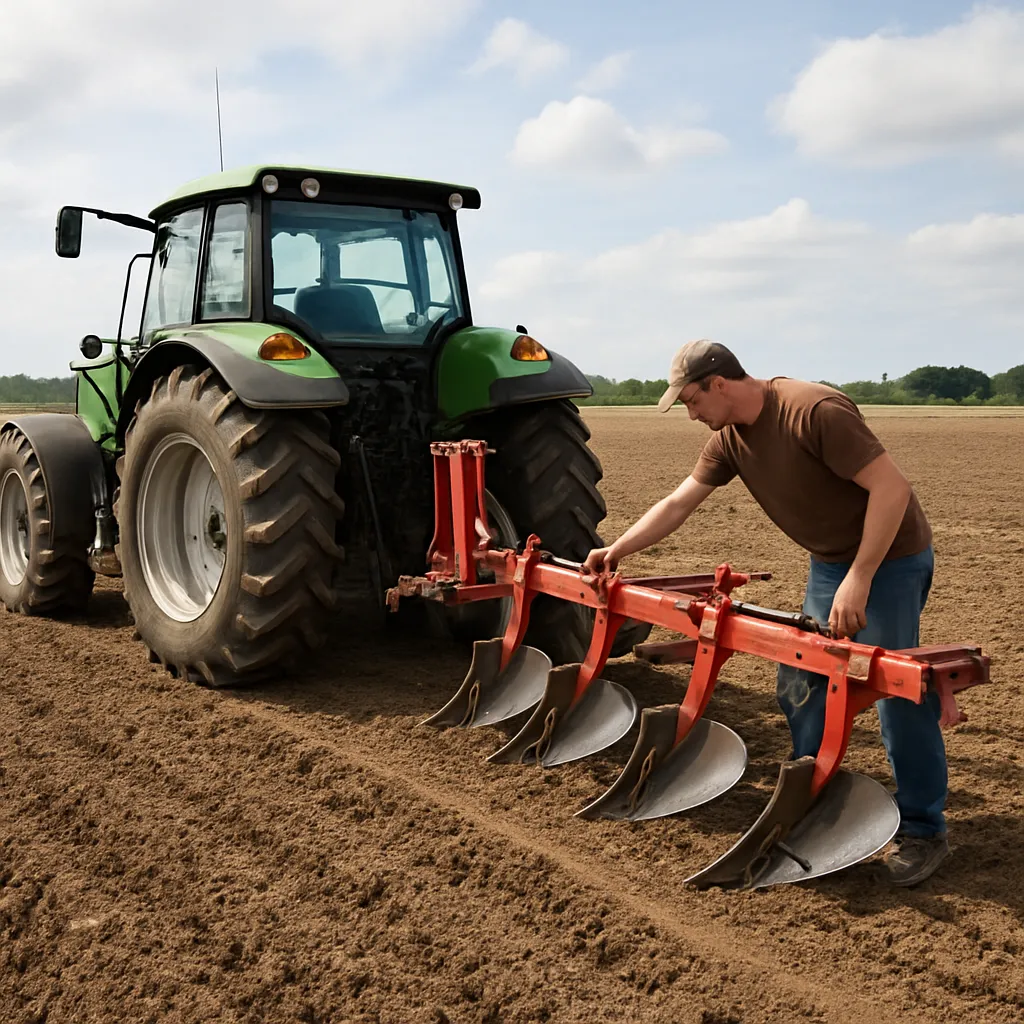
Attaching the Plow to the Tractor
Three-Point Hitch Connection
Align the tractor so that the lower hitch arms are level with the plow’s mounting ears. Insert hitch pins and secure them with retaining clips. Raise the top link into position and tighten until the plow frame is parallel to the ground. Ensure the implement hangs squarely; any twist will affect furrow alignment. Confirm that the hitch limiting chains or sway bars are engaged to prevent lateral movement.
Securing the PTO Shaft (if applicable)
Attach the Power Take-Off (PTO) shaft only on plows with rotating discs or power-driven coulters. Slide the shaft yoke onto the tractor’s splined output and engage the locking collar. Check the safety shield for proper coverage. Spin the shaft by hand to ensure free rotation without binding. A poorly aligned PTO leads to rapid joint wear and potential operator injury.
Fine-Tuning Draft Links and Stabilizers
Use the tractor’s draft sensing ability to maintain consistent soil penetration. Adjust the lower link draft arms so that the plow senses resistance in the soil and automatically modifies the lift height. Engage stabilizer bars or chains to limit sideplay, which maintains straight furrows along field edges. Practice a few test passes on a small plot to validate that the draft system responds correctly to changing soil conditions.
Optimizing Plowing Operation
Setting Correct Depth and Tilt
Once the implement is attached, perform a trial run at normal travel speed. Stop to measure furrow depth and check for complete inversion of soil. Adjust the top link to alter tilt and correct the plow shin angle. If furrows are too shallow, lower the draft arms slightly; if too deep, raise them. These fine adjustments maximize fuel economy by matching draft force with engine output.
Balancing Wheel Ballast and Traction
Proper tractor ballast prevents spinning and slipping. Add front or rear wheel weights to increase traction on soft ground. Over-ballasting, however, can exacerbate soil compaction. Use dual wheels or flotation tires on wet fields to distribute weight evenly. Monitor tire pressures for optimal grip; front tires often run slightly lower than rear to promote steering control without sacrificing load capacity.
Maintaining a Consistent Travel Speed
Core tillage performance relies on steady ground speed. For most plowing tasks, maintain 5–7 km/h. Faster speeds can cause incomplete furrow inversion, while slower speeds increase fuel consumption per hectare. Engage cruise control if available, or coordinate throttle and clutch inputs to avoid jerking. Consistent forward motion reduces draft fluctuations and preserves the sharpness of plow shares.
Routine Maintenance and Troubleshooting
Daily and Seasonal Maintenance
At day’s end, clean soil buildup from the plow frame and shares to prevent corrosion. Inspect hitch pins and hydraulic hoses for wear or damage. Grease all pivot points according to the lube schedule. Before the next season, recondition moldboards and service wheel bearings. Store the plow in a sheltered area or cover it to extend the life of metal components.
Identifying and Solving Common Issues
If the tractor pulls to one side, redo hitch alignment and check for uneven tire pressure. Excessive draft horsepower may signal dull shares, clogged coulters, or overly aggressive depth settings. Hydraulic lag or jumping during lift indicates air in the system or worn cylinders. Address these problems promptly to avoid accelerated wear on the tractor’s transmission and engine.
Safety Precautions
Always shut off the engine before making adjustments. Lower the plow to the ground and engage the parking brake. Use wheel chocks when working on slopes. Wear protective gloves and eye protection when handling sharp shares. Keep bystanders clear of moving implements and rotating PTO shafts. Adhering to safety protocols reduces risk of injury and equipment damage.