Proper care and attention to a tractor’s electrical system can prevent costly downtime and ensure reliable operation during fieldwork. This guide provides practical tips to keep your battery, alternator, wiring harness and related components in top condition. Following these steps will help you avoid unexpected breakdowns, improve safety, and extend the overall lifespan of your machinery.
Understanding Your Tractor’s Electrical Components
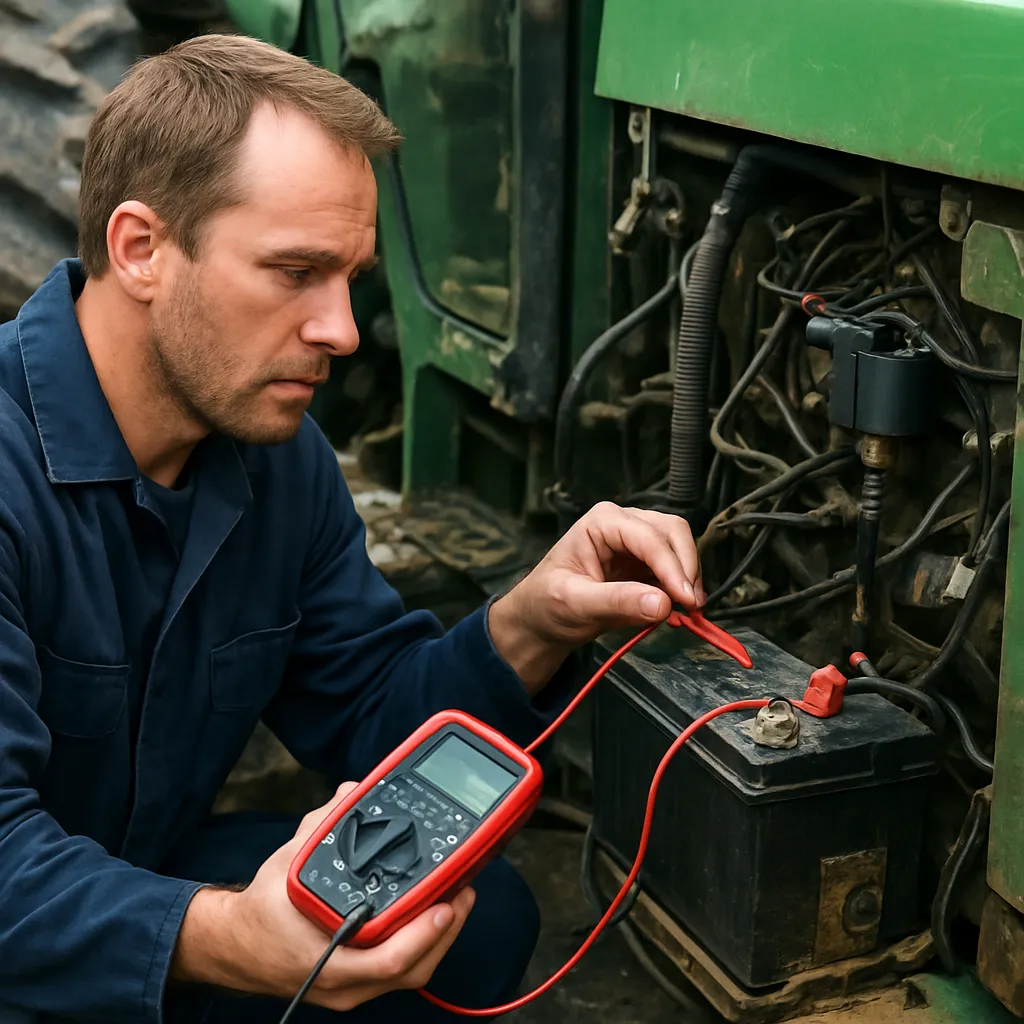
Before performing any service, it’s essential to familiarize yourself with the main elements of a tractor’s electrical system. The heart of this setup is the battery, which supplies the initial current needed to start the engine. Once running, the alternator takes over by converting mechanical energy into electrical power, replenishing the battery and feeding the electrical circuits. A network of wiring and connectors distributes this power to lights, sensors, gauges, starter motor and auxiliary attachments.
In addition to the battery and alternator, you’ll find a starter solenoid, voltage regulator, ignition switch and various fuses or circuit breakers. Each part plays a specific role:
- Starter Solenoid: Acts as a heavy-duty switch, allowing current to flow to the starter motor.
- Voltage Regulator: Ensures the charging voltage remains within a safe range, preventing overcharging or undercharging.
- Fuses and Circuit Breakers: Protect wiring and devices from overloads or short circuits.
- Sensors and Indicators: Monitor system performance and warn of issues like low charge or electrical faults.
Understanding how these components interact will guide your maintenance strategy and help you pinpoint problem areas when troubleshooting electrical faults.
Regular Inspection and Cleaning
Routine checks are the foundation of effective electrical care. Dirt, moisture and corrosion can degrade connections and create resistance, leading to startup troubles or dim lights. Schedule a visual inspection at least once a month or more frequently if you operate in dusty, wet or corrosive environments.
Battery Terminals and Housing
- Check for white, green or bluish corrosion around terminal posts. This buildup can hinder current flow.
- Clean terminals with a mixture of baking soda and water, using a stiff brush to remove deposits.
- Apply a thin layer of dielectric grease or petroleum jelly to prevent future corrosion.
Cable and Wiring Harness
- Inspect wiring for cracks, abrasions or exposed conductors.
- Ensure all cables are securely fastened away from moving parts or high-temperature areas.
- Replace any damaged sections promptly, using appropriate gauge wire and quality connectors.
Alternator and Grounding Points
- Examine the alternator belt tension and condition. A loose or worn belt reduces charging efficiency.
- Clean the alternator housing to improve heat dissipation and extend service life.
- Verify all grounding straps and bolts are tight and free of rust, ensuring a solid return path for current.
Troubleshooting Common Electrical Issues
When you encounter an electrical fault, a systematic approach to diagnosis can save time and frustration. Start with the simplest checks before moving on to more complex testing.
Engine Fails to Crank
- Confirm the battery has adequate charge using a multimeter. A healthy battery should read around 12.6 volts when rested.
- Inspect the starter solenoid connections for looseness or corrosion.
- Check the ignition switch and safety interlocks, such as neutral or PTO (power take-off) safety switches.
Battery Drains Quickly
- Look for parasitic draws. Disconnect components one by one (lights, radios, monitors) to see if the drain stops.
- Test the alternator output while the engine runs; it should provide around 13.8–14.4 volts.
- Replace aged batteries; most start losing capacity after 3–5 years of service.
Lights Flicker or Dim
- Verify battery connections and ground straps, as loose contacts often cause flickering.
- Inspect the alternator brushes and slip rings if present; excessive wear can disrupt charging.
- Examine light fixtures for moisture intrusion and corroded terminals.
Best Practices for Long-Term Maintenance
Implementing a few proactive measures will keep your tractor’s electrical system in peak condition and reduce unscheduled repairs.
- Use sealed or maintenance-free batteries when possible, reducing the need for topping up electrolyte levels and cleaning.
- Apply anti-seize compound on terminal threads and grounding bolt locations to ease future servicing.
- Cover exposed wiring with split loom tubing or heat-shrink sleeves to guard against abrasion and moisture.
- Maintain a service log detailing inspection dates, voltage readings, belt replacements and any repairs performed.
- Store cables and spare parts in a clean, dry environment to prevent premature corrosion or damage.
- Train operators to recognize early warning signs such as slow cranking, unusual noises or dashboard alerts.
By regularly inspecting components, cleaning contacts, and using quality replacement parts, you’ll ensure your tractor’s electrical system remains reliable and efficient season after season. Consistent maintenance not only preserves functionality but also safeguards your investment in heavy equipment.